Want to build an MCP app with Claude Code, so your tool shows a small interactive card instead of plain text? The MCP Apps plugin teaches Claude Code how to do exactly that. It adds four skills that know the MCP Apps SDK, so you do not have to learn it first.
We loaded the plugin in a throwaway sandbox, asked for a tip-splitting card, and checked what Claude Code built. This guide shows the prompts, the code, the real output and the one thing we could not test.
This guide is part of our Claude Code tutorials. Find more add-ons in our Skills Directory.
Tested with Claude Code v2.1.318 on November 8, 2026. The plugin is mcp-apps version 0.1.0, loaded from the modelcontextprotocol/ext-apps repository at commit 19256f5. The official marketplace entry pins an earlier commit, so what you install may differ slightly from what we loaded.
Quick Summary
| Question | Answer |
|---|---|
| What it is | A Claude Code plugin with four skills for building MCP Apps |
| Maker | Listed as Anthropic and the Model Context Protocol project |
| Official install command | /plugin install mcp-apps@claude-plugins-official |
| How we loaded it | --plugin-dir in a sandbox, nothing installed |
| Account needed | No |
| What we built | A tool called split_bill with an interactive card |
| What we did not test | Opening the card inside a real host such as Claude Desktop |
What Is an MCP App?
MCP stands for Model Context Protocol. A normal MCP server gives Claude tools, and the tools return text. Our guide to MCP guide explains how that works.
An MCP App goes one step further. According to the plugin’s own guide, it pairs a tool with an HTML page, so a host that supports it can show an interactive card right in the conversation.
Think of a tip calculator. Plain text says “Total 99.71, 24.93 each”. A card shows a slider you can drag to change the tip and watch each person’s share update.
Tool plus resource
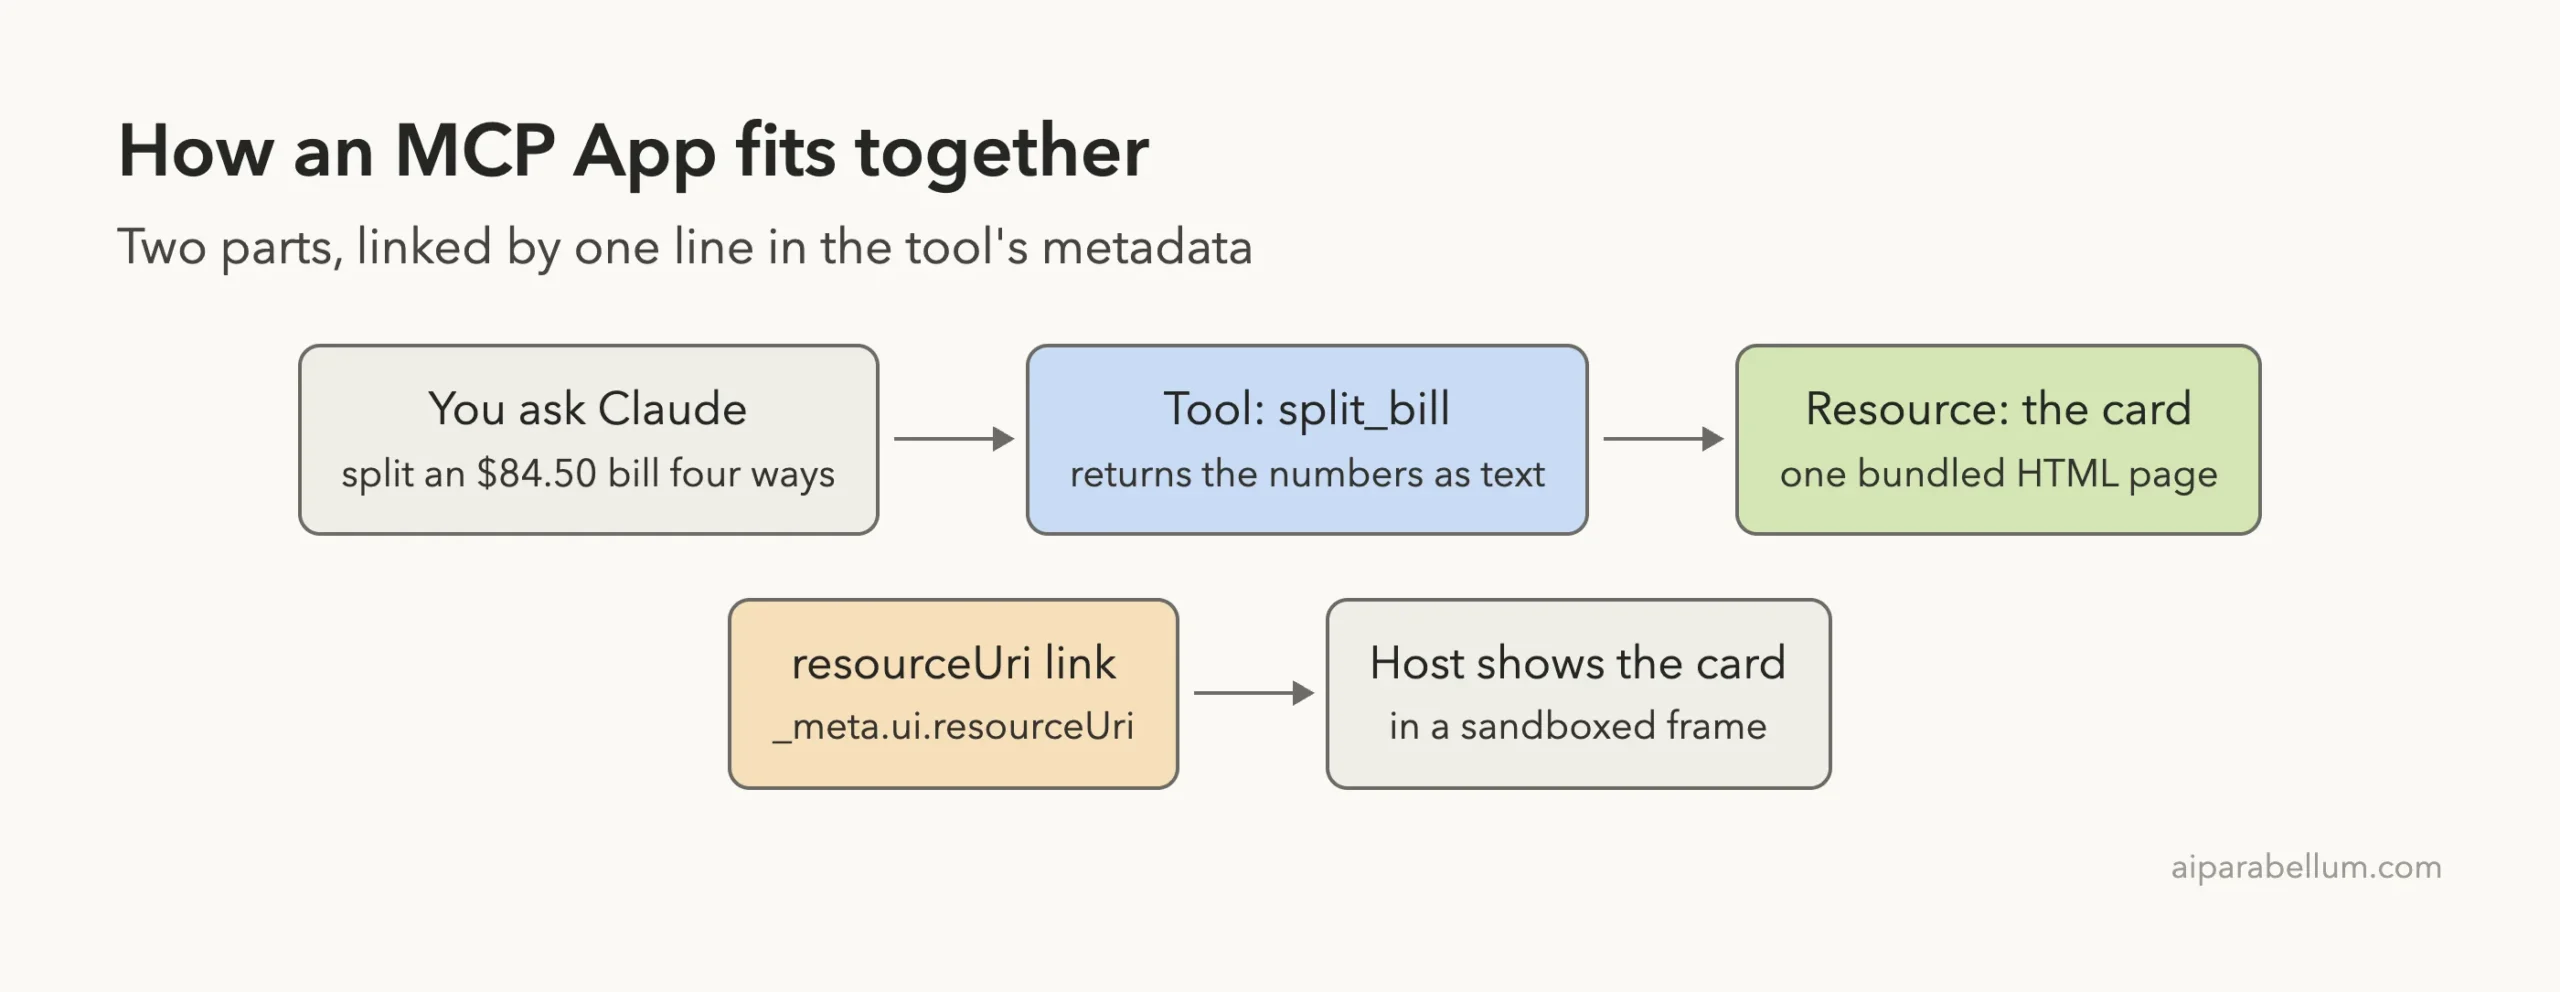
The plugin’s skill describes every MCP App as two parts that link together.
- The tool is called by Claude or the host, and it returns data.
- The resource serves the bundled HTML page that displays that data.
- One line in the tool’s metadata,
_meta.ui.resourceUri, connects the two.
What the MCP Apps Plugin Contains
We read the plugin before running it. It holds a short plugin.json, a README and four skill files. It has no hooks and no scripts of its own, so nothing runs unless Claude follows a skill’s instructions.
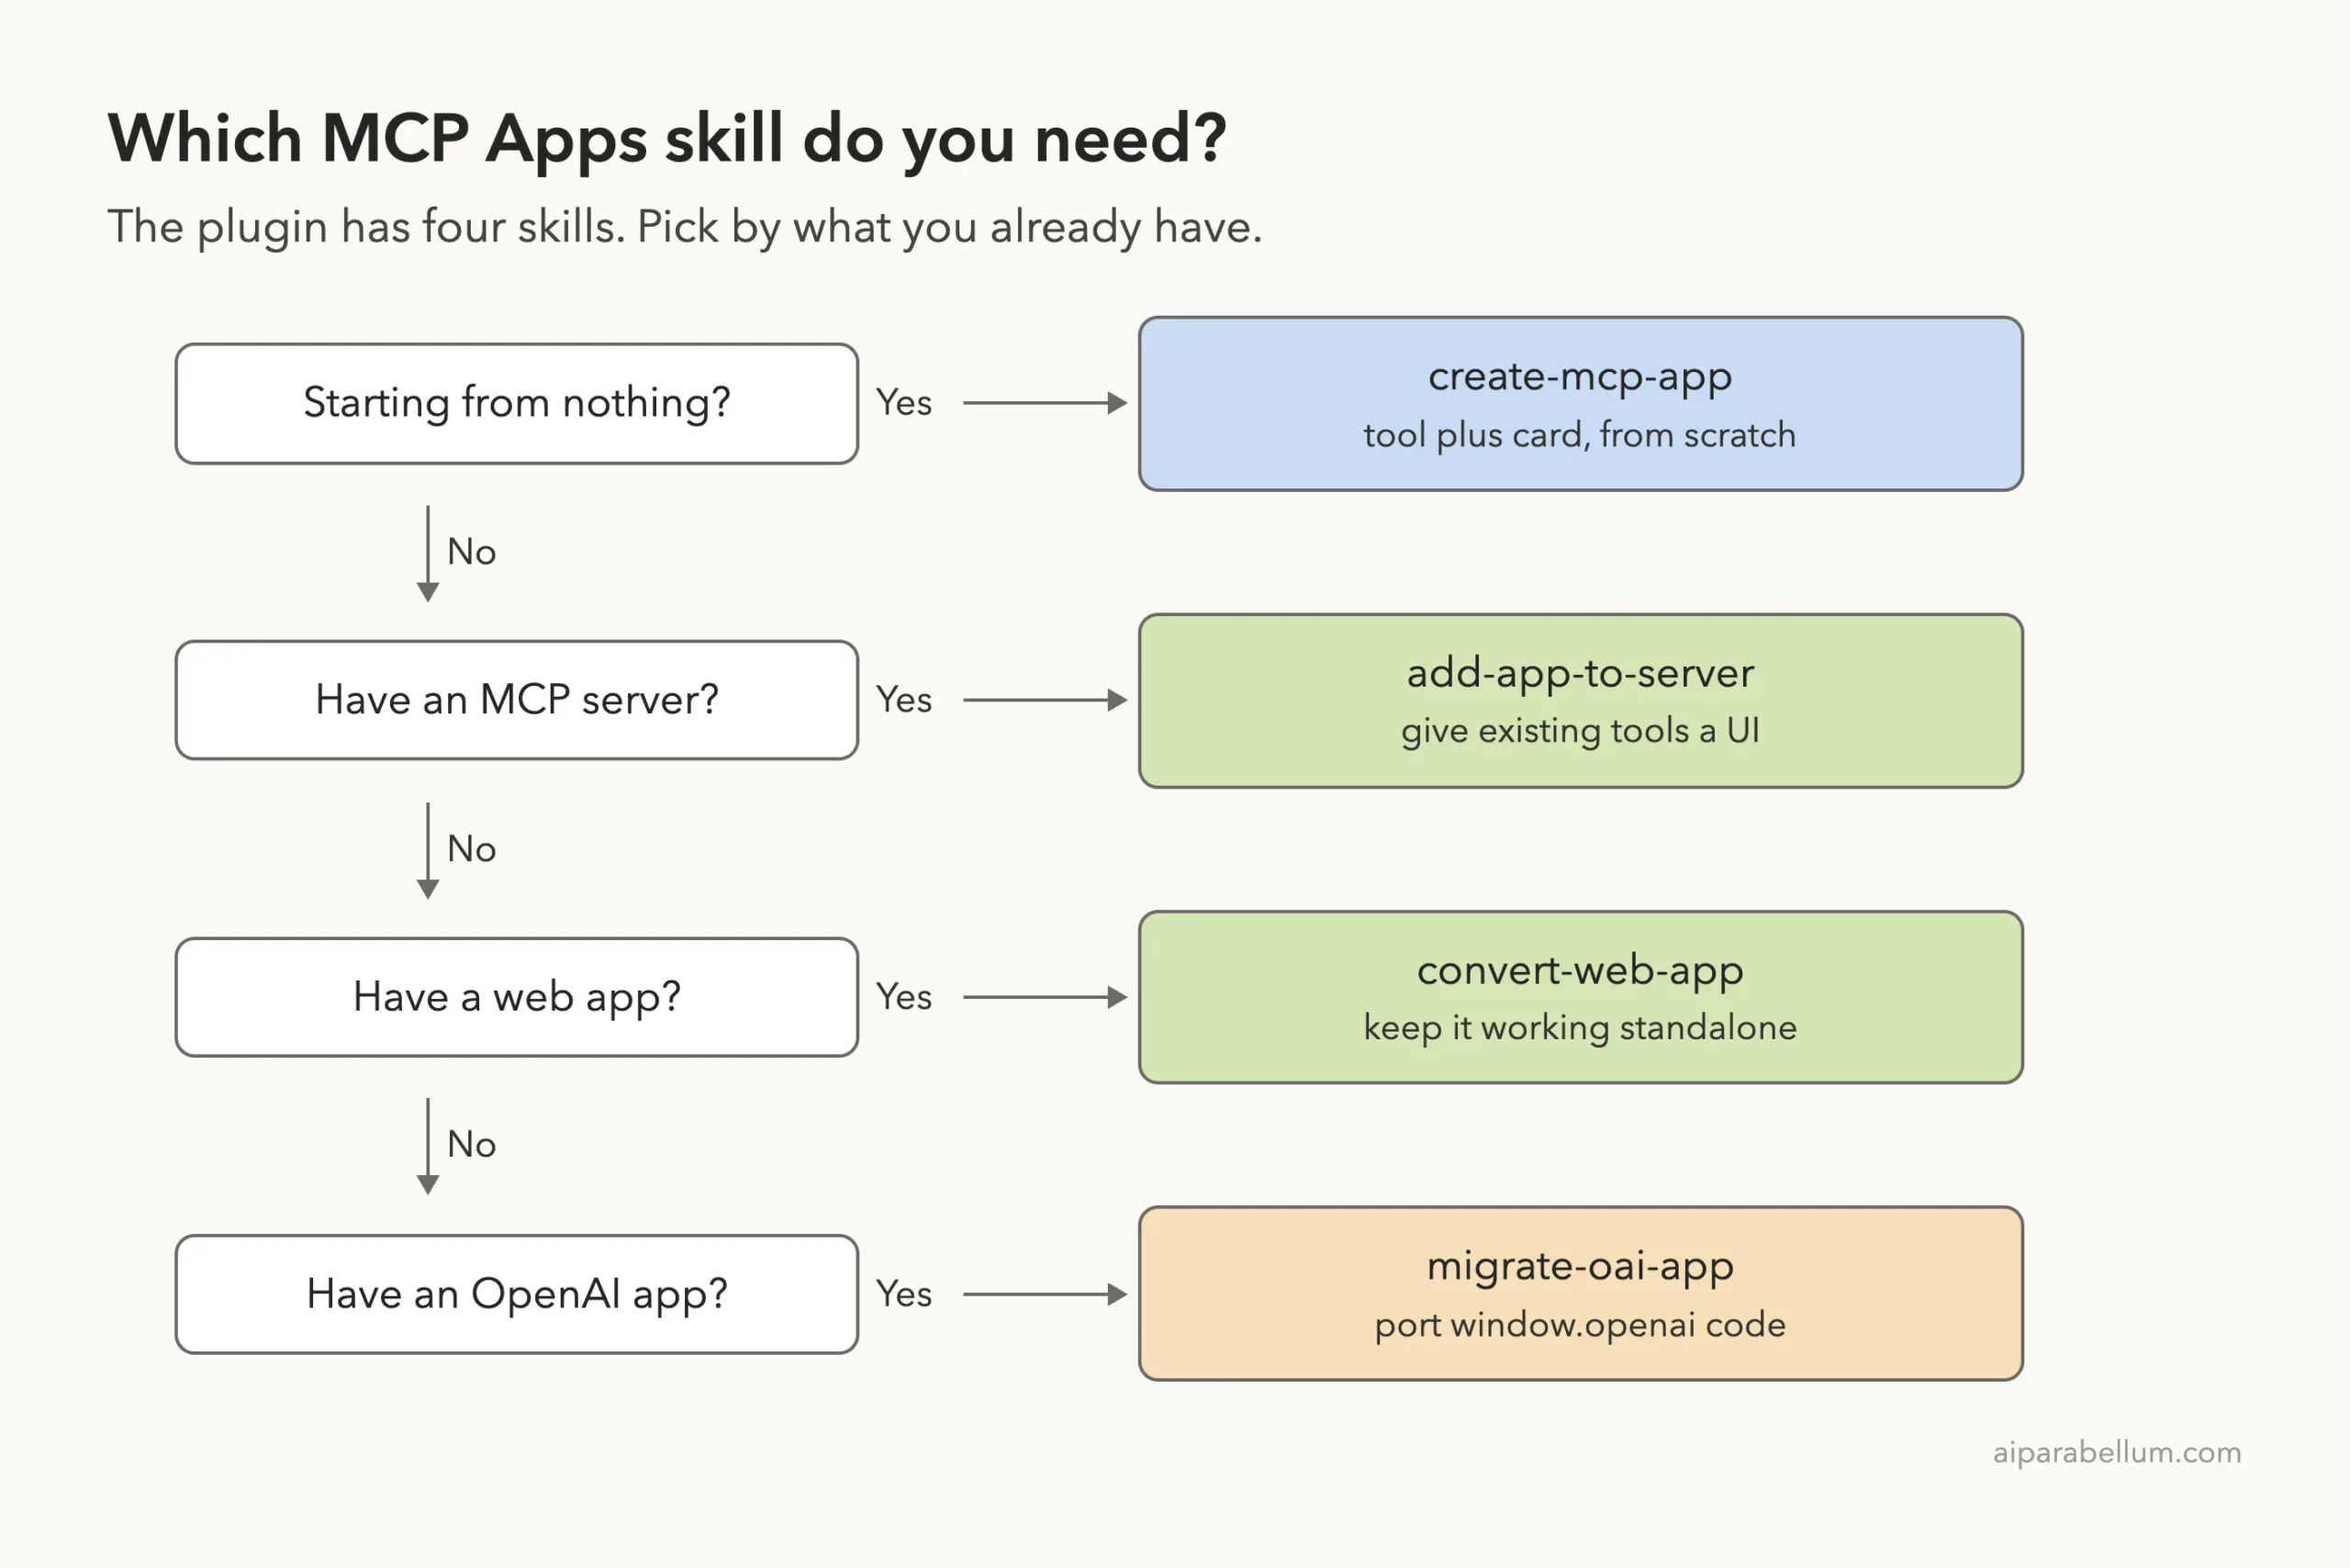
| Skill | Use it when |
|---|---|
create-mcp-app | You are starting a new MCP App from scratch |
add-app-to-server | You already have an MCP server and want a UI on its tools |
convert-web-app | You have a web app and want it to also work as an MCP App |
migrate-oai-app | You have an OpenAI Apps SDK app to port over |
If you are new to skills, our guide to Claude Code skills covers the basics, and the Claude Code plugins guide shows how plugins are found and managed.
How We Set Up the Test Safely
We did not touch our real Claude Code setup. The official docs describe the normal way to install plugins, and our Claude Code sandbox guide covers isolation. Here is what we did instead.
- We cloned the plugin repository into a sandbox folder and created an empty demo project next to it.
- We started Claude Code with
--plugin-dirpointing at the plugin folder, so nothing was installed. - We used
--setting-sources project, so only the demo project’s settings loaded. - We allowed shell commands for that session so Claude could run
npmwithout stopping to ask, and we only did this in the throwaway folder.
For the normal route, the plugin’s README gives /plugin marketplace add modelcontextprotocol/ext-apps followed by /plugin install mcp-apps@modelcontextprotocol-ext-apps. The official marketplace lists the same plugin, which is what the install command in the table above uses.
Step 1: Check That the Skills Loaded
Typing /mcp-apps: in the prompt box lists the plugin’s slash commands. All four skills showed up, each with the same long description that tells Claude when to use it.
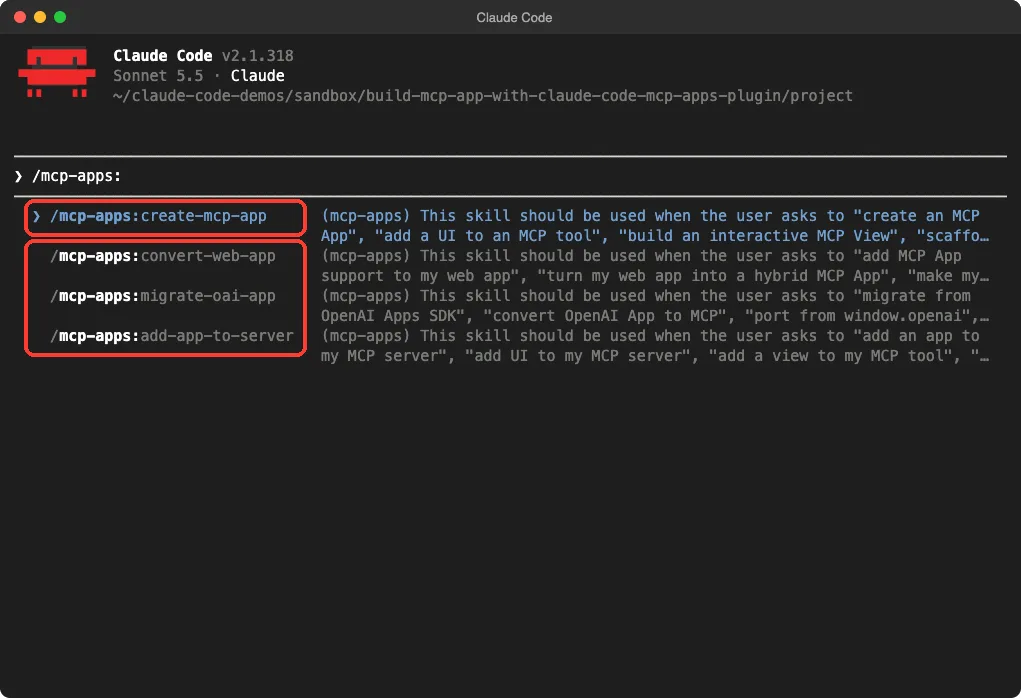
/mcp-apps: lists the four skillsThen we ran /skills. It showed four entries, each marked as locked by the plugin and costing roughly 120 to 180 tokens at rest. That is a small cost for something you may use only once in a while.
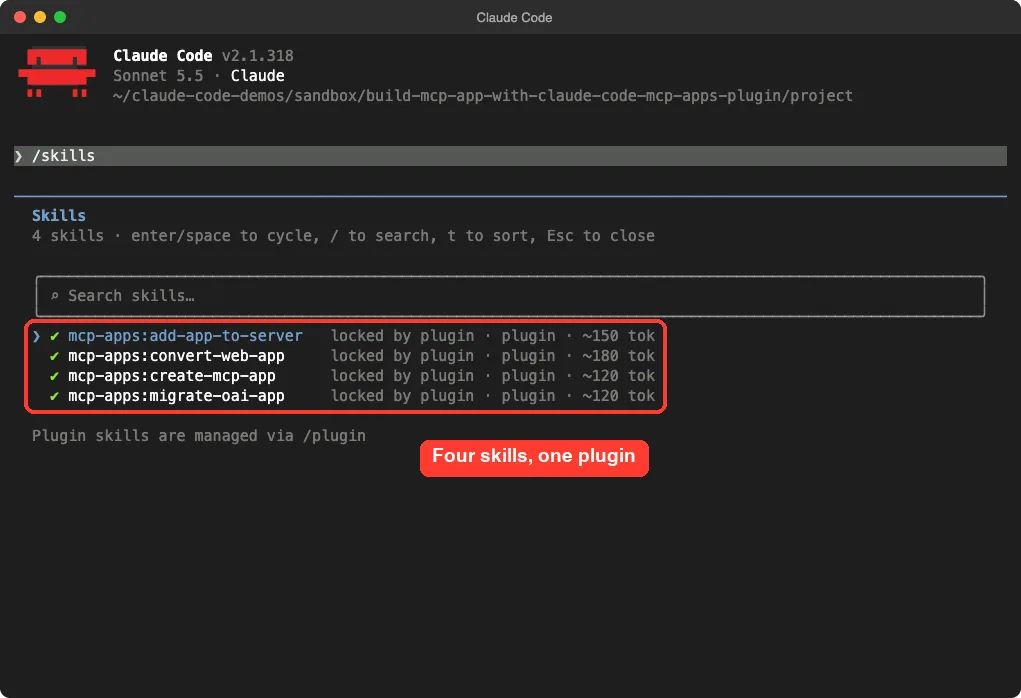
/skills list shows four plugin skills and their token costStep 2: Ask Claude Code to Create the MCP App
We kept the request small. We wanted a single tool and a single card, with no frameworks, so the result would be easy to read.
Create an MCP App in this folder: a tool called split_bill that takes a bill amount, a tip percent and a number of people, and shows a small interactive card where I can change the tip and see each person's share. Use vanilla JS, keep it as small as possible, and use tsx. Do not start any servers.Claude Code loaded the plugin’s create-mcp-app skill. The skill tells Claude to clone the SDK for reference code, and to add dependencies with npm install rather than typing version numbers from memory. The whole build finished in about 40 seconds of Claude’s working time after the setup steps.
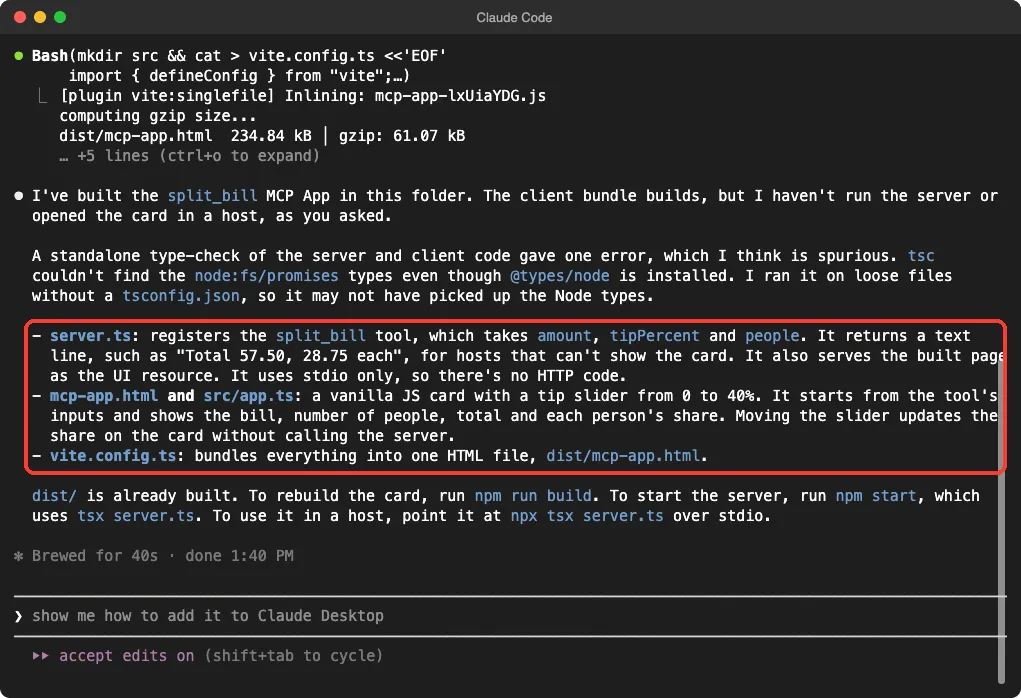
When it finished, Claude summarized three files. It also said plainly that it had not run the server or opened the card, as we asked.
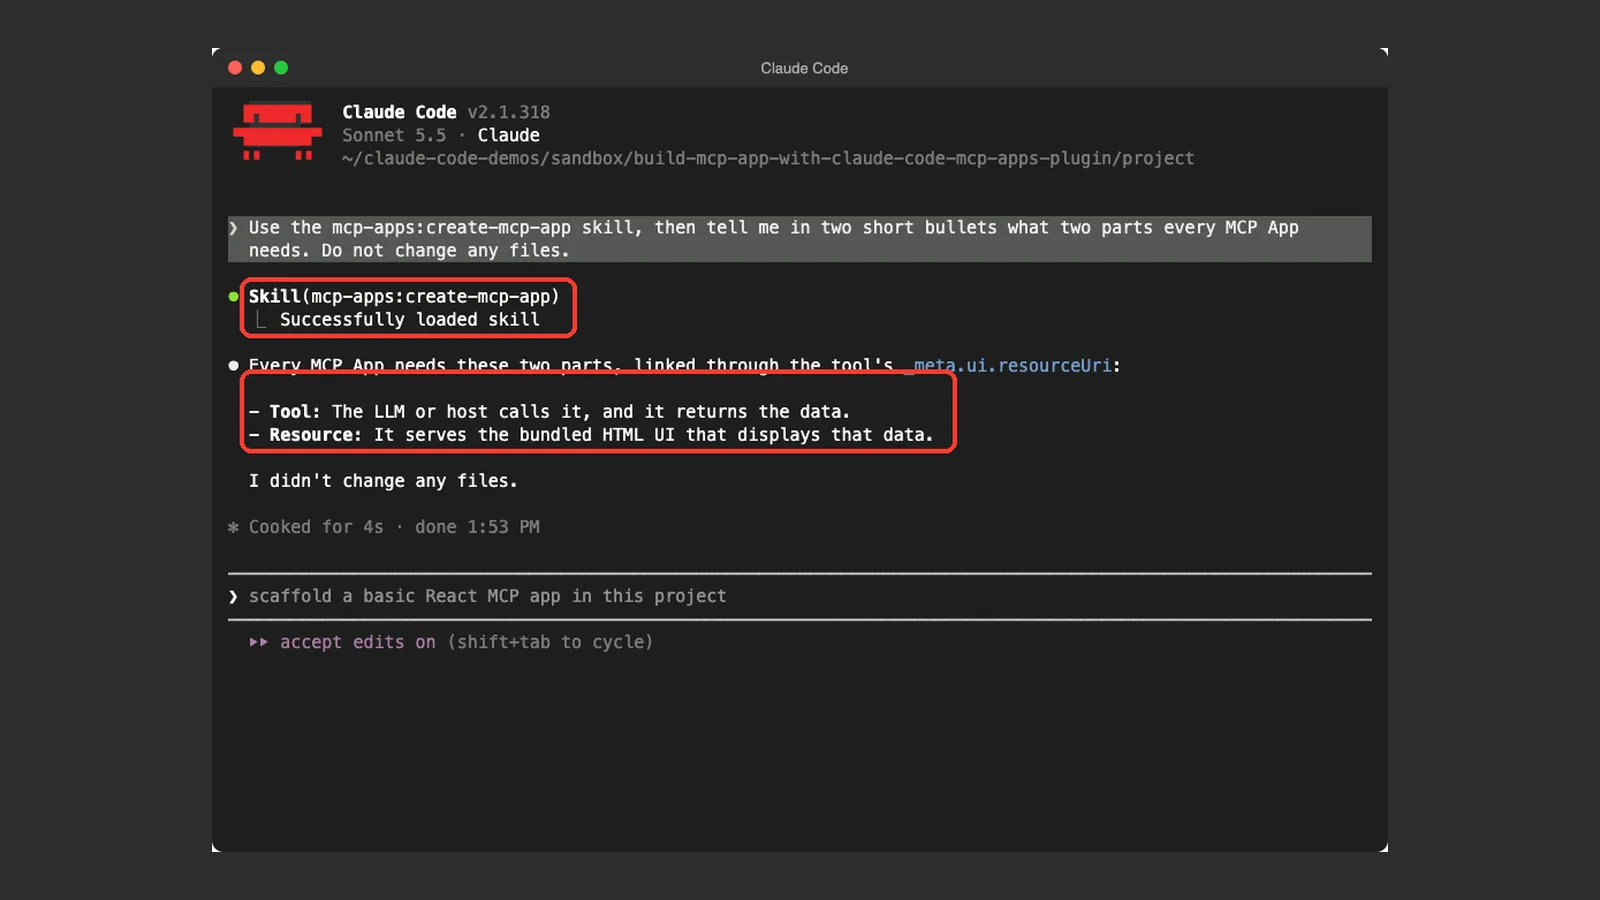
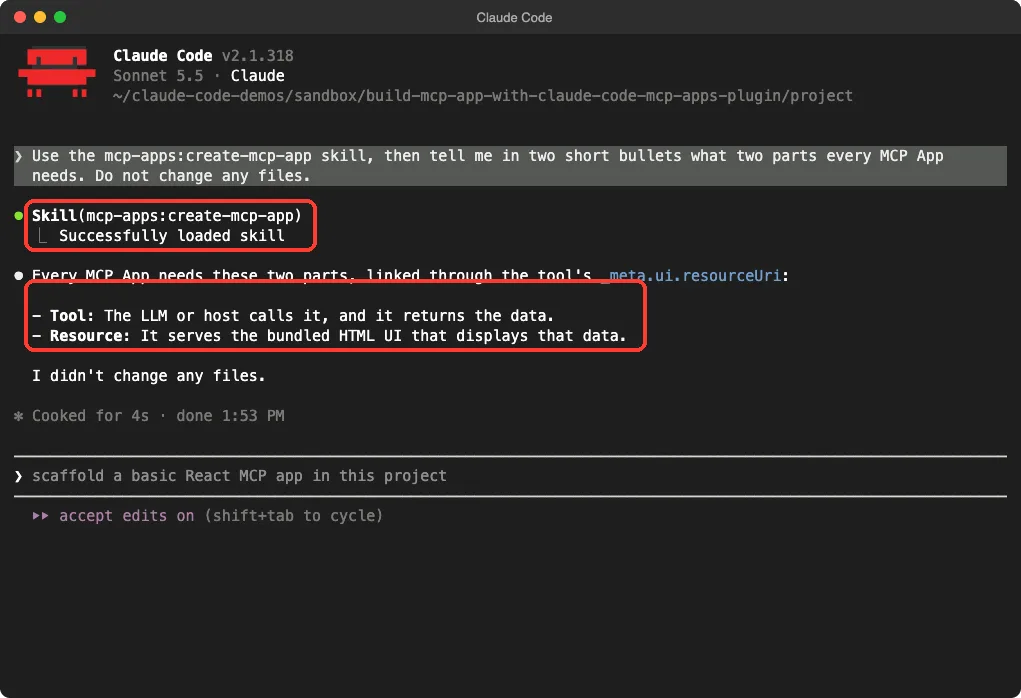
Proof the skill was used
In a separate short session, we asked Claude to use the skill and answer one question. The screen shows a Skill(mcp-apps:create-mcp-app) line, then a short answer that matches the skill’s text: every MCP App needs a tool and a resource.
What Claude Code Built
The project ended up with a handful of files. The first version had a server, a card and a build config.
project/
  server.ts          the tool and the resource
  mcp-app.html       the card's page
  src/app.ts         the card's logic
  vite.config.ts     bundles everything into one HTML file
  dist/mcp-app.html  the built card, about 235 KB
The server
The server registers the tool with registerAppTool and the card with registerAppResource. The key line is the metadata that points the tool at the card. This is the trimmed core of the file Claude wrote.
const uri = "ui://split-bill/mcp-app.html";

registerAppTool(server, "split_bill", {
  title: "Split Bill",
  description: "Split a bill with tip between people. Shows an interactive card.",
  inputSchema: z.object({
    amount: z.number().positive(),
    tipPercent: z.number().min(0),
    people: z.number().int().min(1),
  }),
  _meta: { ui: { resourceUri: uri } },
}, async ({ amount, tipPercent, people }) => {
  const total = amount * (1 + tipPercent / 100);
  return { content: [{ type: "text",
    text: `Total ${total.toFixed(2)}, ${(total / people).toFixed(2)} each` }] };
});
Notice the text answer. The skill lists “no text fallback” as a common mistake, and Claude included one, so hosts that cannot show cards still get the numbers.
The card
The card is a small TypeScript file using the SDK’s App class. It reads the tool’s inputs, shows the bill, the number of people, the total and each share, and recalculates when you move the slider. The slider works without calling the server again, which Claude pointed out in its summary.
The skill says to register every handler before calling app.connect(). Claude’s file does that: it sets app.ontoolinput first, then connects on the last line.
Step 3: Serve It Over HTTP
Our first build used stdio only. We wanted to test it with a client, so we sent a second prompt in the same project.
Add a main.ts that serves this same server over HTTP at http://localhost:3001/mcp (like the basic-server-vanillajs example), keeping stdio as an option with --stdio. Install what it needs. Do not start it.Claude installed the extra packages, moved the server into a createServer() function, added main.ts, and ran a full TypeScript check. It also added a tsconfig.json, which fixed the odd type warning it had mentioned earlier.
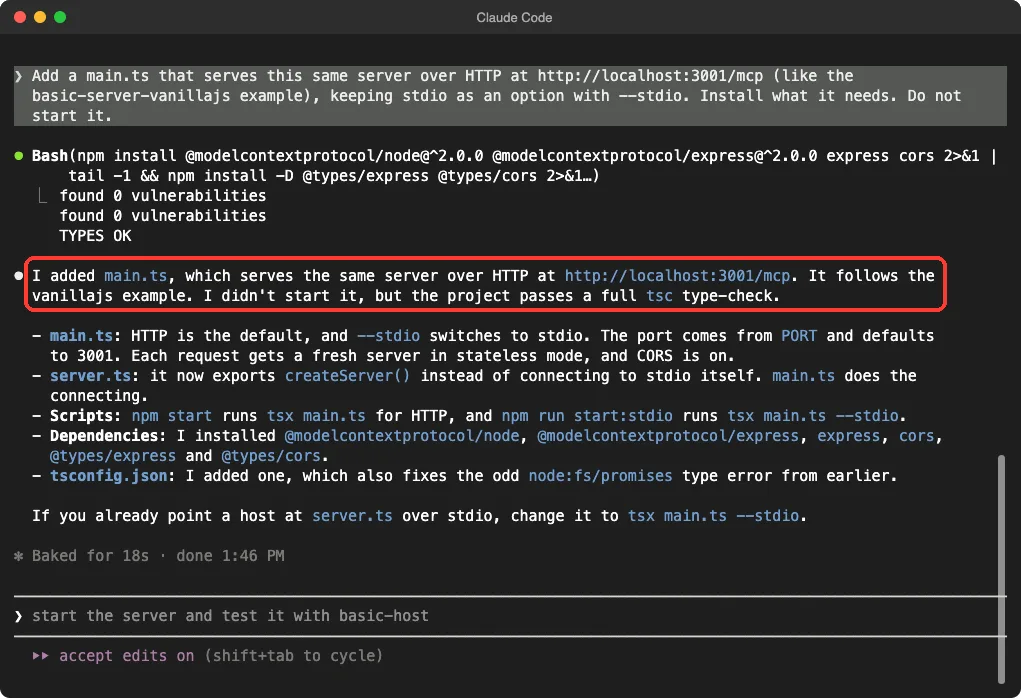
Our plain npm start now runs tsx main.ts, and npm run start:stdio runs the stdio version.
Step 4: Check the Result With a Real MCP Client
This is the part we want to be honest about. We could not open the card in a host. We tried the SDK’s reference host, but our safety checks blocked installing code from a cloned third-party repository, so we skipped it instead of forcing it.
Instead, we checked the server with a short client script.
We read it first, and it only talks to localhost. It lists the tools, calls split_bill with 84.5, 18 and 4, then lists and reads the card resource. We asked Claude Code to start the server, run the script and show the raw output.
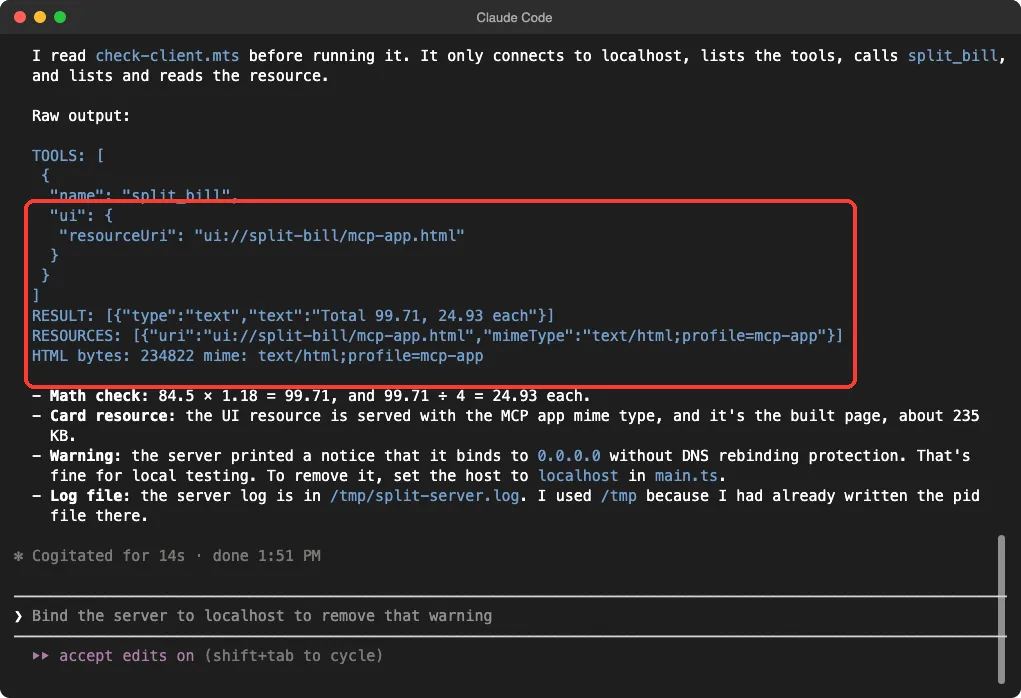
Here is what the output proved.
- The tool’s metadata contains
resourceUriset toui://split-bill/mcp-app.html. - The call returned “Total 99.71, 24.93 each”. Our own check agrees: 84.5 times 1.18 is 99.71, and divided by four is 24.93.
- The card resource is served with the MIME type
text/html;profile=mcp-appand is about 235 KB.
It did not prove that the slider looks right or behaves well, because no host rendered it. Claude also flagged a notice that the server binds to 0.0.0.0 without protection against DNS rebinding. That is fine for local testing, but bind to localhost if you keep the server running.
Try It Yourself
Create an empty folder, load the plugin with --plugin-dir, and paste a small prompt like this one. Pick any tiny idea, such as a unit converter or a countdown card.
Create an MCP App in this folder: a tool called convert_units that takes a number, a from-unit and a to-unit, and shows a small card with the result and a button to swap the units. Use vanilla JS and tsx. Keep it as small as possible and do not start any servers.Then ask Claude to add the HTTP entry point and test it with a client script, as we did. Read the script before you run it.
Common Mistakes
- Forgetting the text fallback. Always return a
contentarray so hosts without card support still show an answer. - Registering handlers after
app.connect(). The skill says to register them all first. - Skipping the CSP setting. The skill warns that every network request from the card, even to localhost, needs a CSP configuration.
- Putting CSP or domain settings in the wrong place. They belong in the objects returned by the resource’s read callback, according to the skill.
- Typing package versions by hand. Let
npm installpick them. - Assuming the card works because the server runs. Check it in a real host before you share it.
Pro Tips
- Start with the smallest card that proves the idea, then add features one prompt at a time.
- Use
add-app-to-serverif you already have an MCP server. It is built for adding a UI to existing tools. - Keep the text result useful on its own, since not every host shows cards.
- Our guide to MCP server guide covers the server side if you are starting from zero.
- New to the model behind these tools? Read our Claude AI overview.
Honest Verdict
The plugin did what it promises. It loaded cleanly, Claude invoked its skill, and the code it produced registered a tool, linked it to a card and served that card correctly. The numbers in the tool result were right.
We did not see the card render, so we cannot judge its look or feel.
We also tested one tiny app, not a complex one. If you build MCP servers and want interactive cards, install it. If you only use Claude Code for ordinary coding, you can skip it.
Check the tool, the link and the card separately, then test the card in a real host.
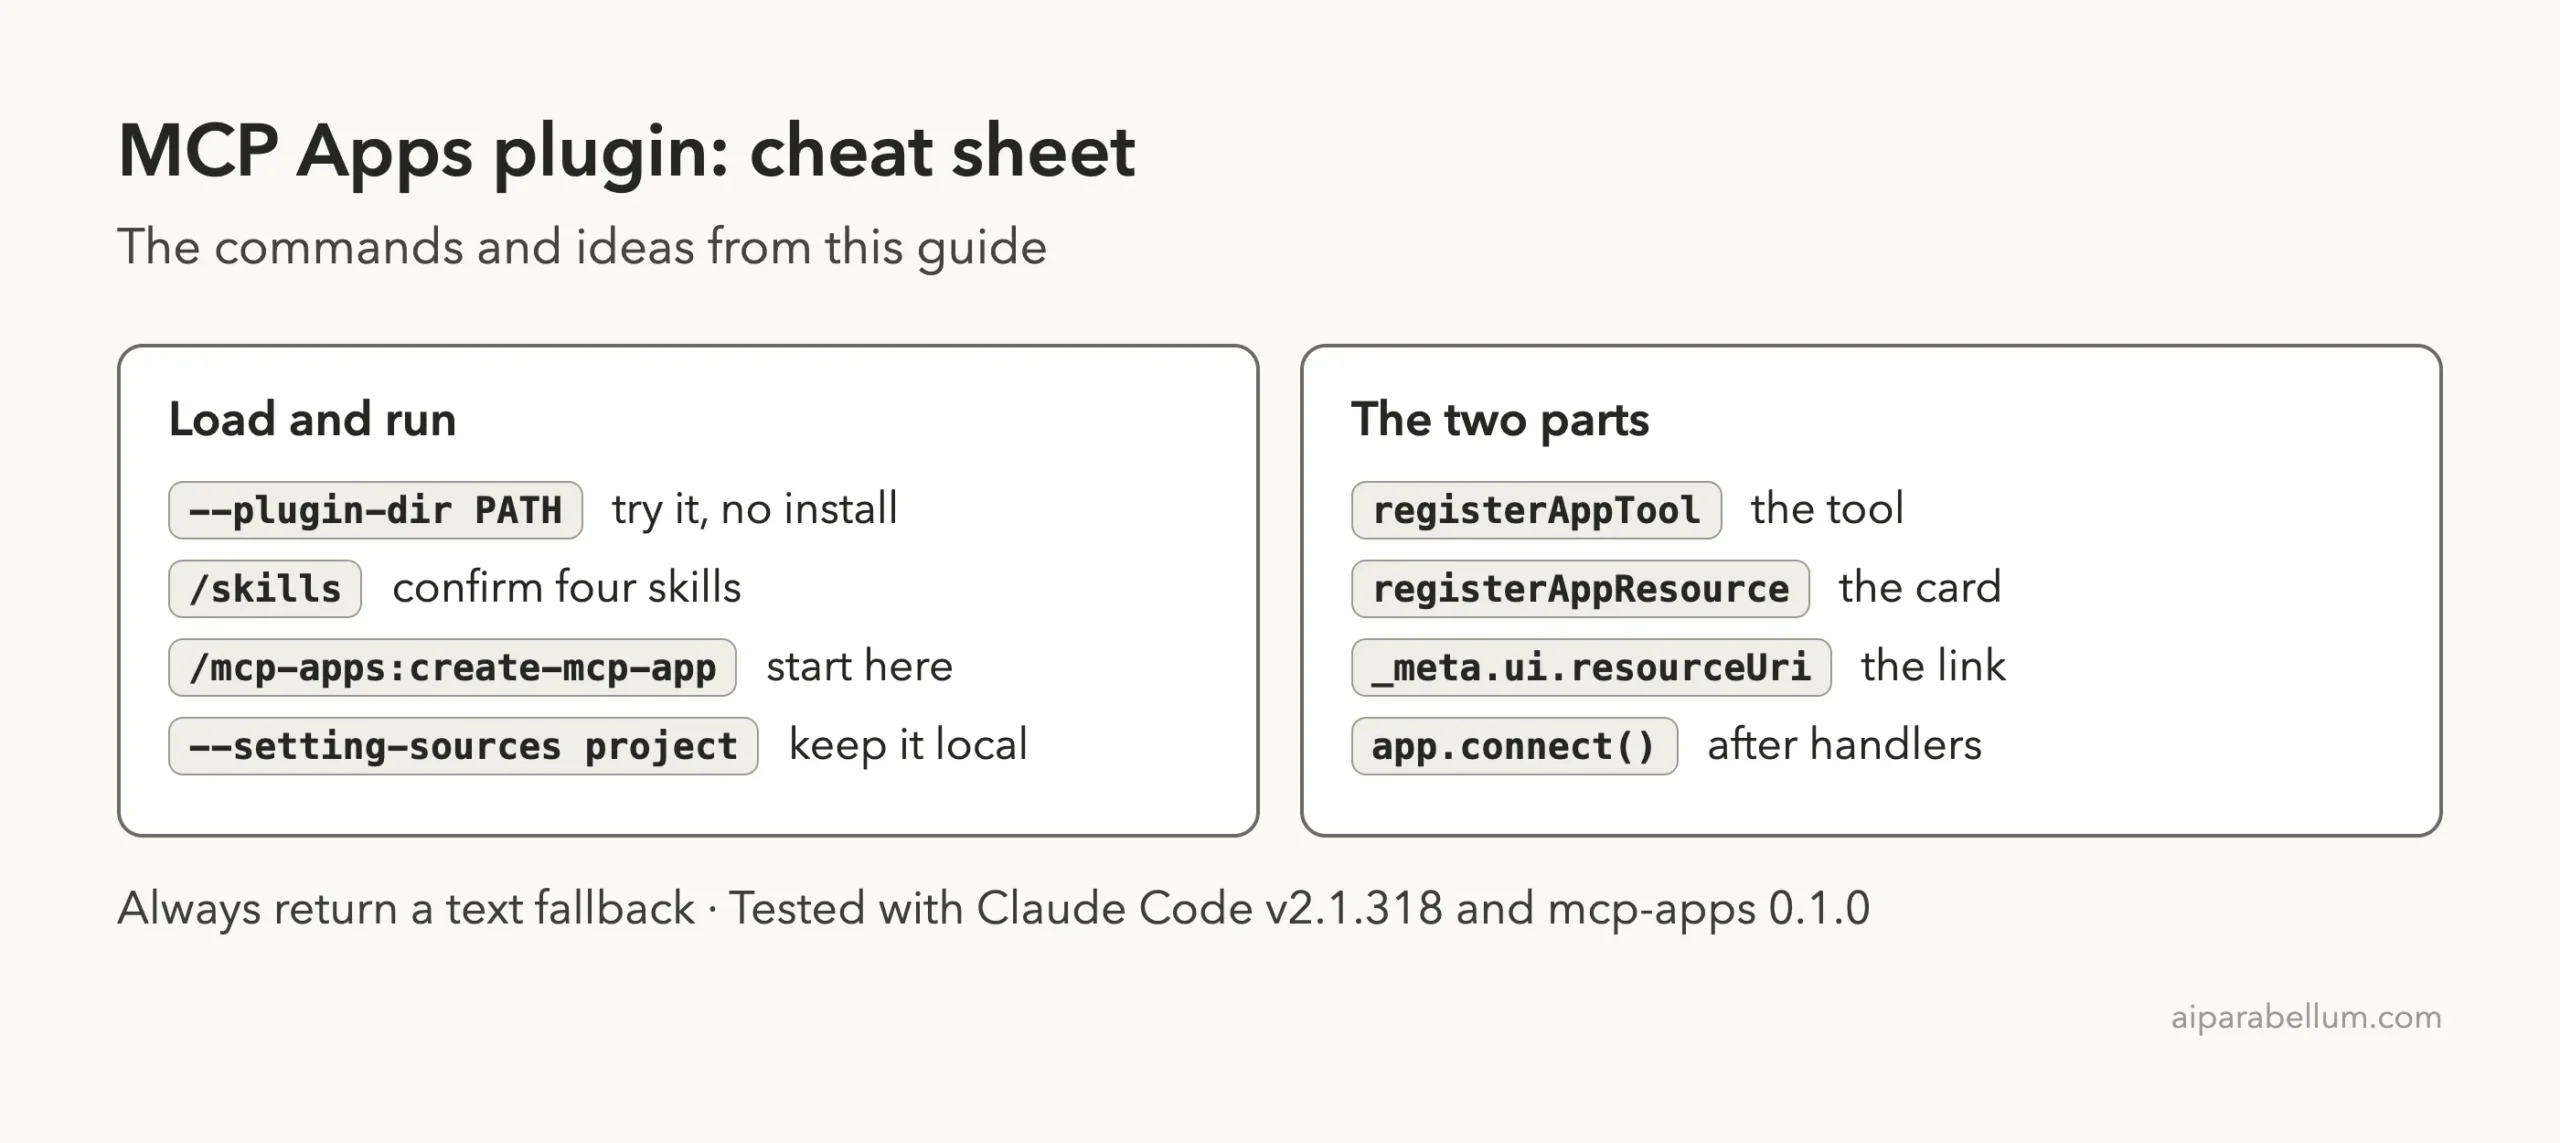
Cheat Sheet
Frequently Asked Questions
Is the MCP Apps plugin free?
The plugin files are free and need no account. Claude Code itself follows your normal plan or API billing.
Which hosts can show an MCP App card?
The plugin’s skill names Claude Desktop as an example of an MCP-enabled host. We did not test any host, so check your host’s own documentation.
Do I need React?
No. The skill lists React, Vue, Svelte, Preact, Solid and plain JavaScript. We used plain JavaScript.
What happens in a host that cannot show cards?
The tool still returns its text result, which is why the skill tells you to always include one.
Can I add a card to a server I already have?
Yes. The plugin’s add-app-to-server skill is made for that. We did not run it, so our test covers only create-mcp-app.
Conclusion
The MCP Apps plugin gives Claude Code the know-how to build a tool and a linked card, and in our test it produced a working server whose tool, result and card resource all checked out. Load it with --plugin-dir, start with a tiny idea, read the code Claude writes, and test the card in a real host before you rely on it.