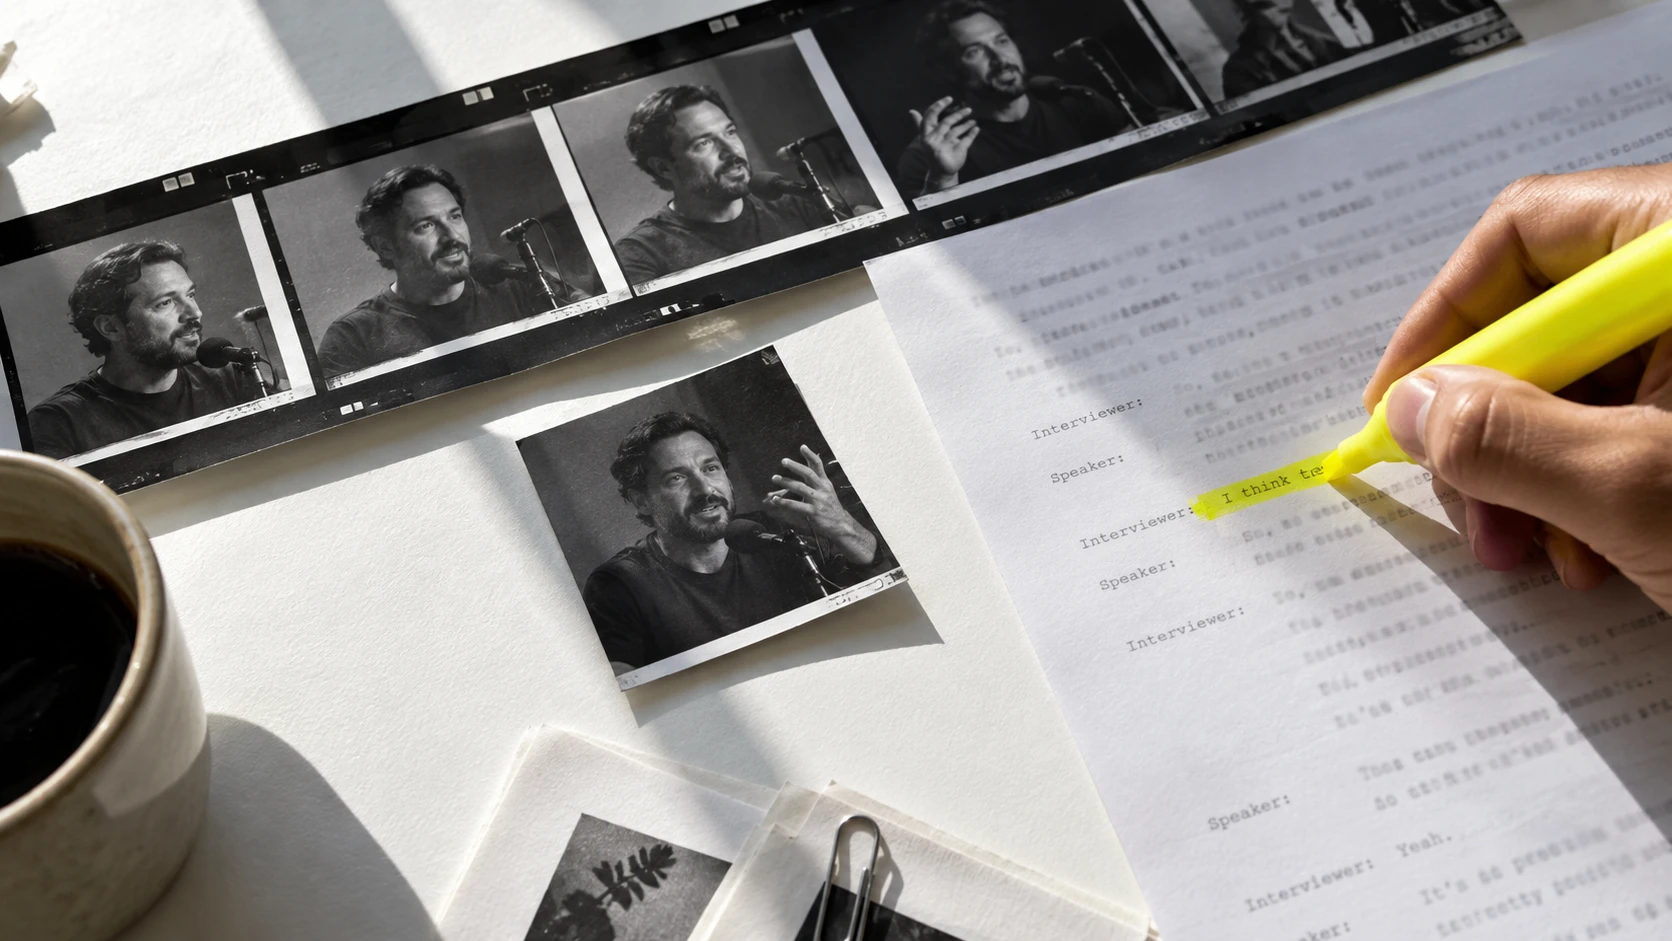
You can edit a talking-head video by deleting the sentences you do not want people to hear. AI text-based video editing turns speech into a transcript linked to your footage, so cutting or moving words also changes the corresponding video.
This tutorial walks you through a complete Descript edit, from importing a recording to exporting an MP4. You will also see where Adobe Premiere fits, how transcript corrections differ from video cuts, and which cleanup choices can make speech sound unnatural.
What Is AI Text-Based Video Editing?
Speech recognition creates a searchable transcript and matches words to moments in your recording. You then use the transcript to build a rough cut before checking timing, sound, and visuals.
Descript’s script editing guide describes the idea simply: “In Descript, you edit your content simply by editing your script.” That makes spoken content easier to navigate, especially when you already know which explanation or answer you want.
This approach suits interviews, screen tutorials, webinars, and video podcasts. For a silent montage, complex action sequence, or music-driven edit, visual timing on a conventional timeline will matter more than the transcript.
Choose an Editor for Your Workflow
Use the following comparison to choose a starting point. The detailed steps below use Descript; menu names and feature access can vary with updates and your plan.
| Editor | Useful starting point | How you work | What to check |
|---|---|---|---|
| Descript | A speech-led tutorial or podcast | Edit linked script text, then review the video and timeline | Media allowances, AI credits, export resolution, and watermark rules |
| Adobe Premiere | A project that also needs detailed timeline finishing | Build or revise a sequence through its transcript, then refine timeline edits | Transcription settings and whether you are editing a source clip or sequence |
If your next task is extracting short clips, the Descript comparison can help you distinguish a transcript editing workflow from automated clip selection. Start by learning deliberate cuts before handing over more editing decisions.
Prepare a Small Practice Recording
Start with a two- to five-minute recording containing clear speech, one repeated sentence, and a few pauses. A short file makes it easier to understand each change and compare it with the original.
- Keep the original recording in a separate folder.
- Use headphones so you can hear clipped words and abrupt joins.
- Decide on one viewer takeaway before making cuts.
- Have any supporting screenshots or demonstration footage ready.
- Use footage you are authorized to upload and edit.
For example, your practice goal could be: turn a rambling camera-setup explanation into a clear demonstration. Remove repeated instructions while preserving every step someone needs to follow.
How to Edit Videos With AI Text-Based Editors: Descript Steps
The screenshots below come from Descript’s official help documentation and show real interface controls. They are reference examples, so the sample recordings and project names differ from your practice video.
1. Import Your Video and Generate the Transcript
Create or open a Descript project, then drag your recording from Finder or File Explorer directly into the script panel. This uploads the file and starts transcription.
Dropping media into the Project panel serves a different purpose: you can store a file there without immediately transcribing it. If no transcript appears, check that you actually added the recording to the script.
Once processing finishes, play a short section while watching the words. Check whether the language, speaker changes, and timing are usable before making a large set of edits.
Clean input audio gives AI transcription a better starting point. Background music, overlapping voices, or an unclear microphone recording can leave you with more corrections.
2. Correct Misheard Words Without Changing the Recording
Double-click a misheard word and choose Correct in the selection toolbar. Enter the spelling you intended, then use Correct for that instance or Correct All when the same replacement is appropriate throughout the project.
For several corrections, press Option+C on Mac or Alt+C on Windows to enter Correct text mode. Press the same shortcut again when you are ready to return to editing.
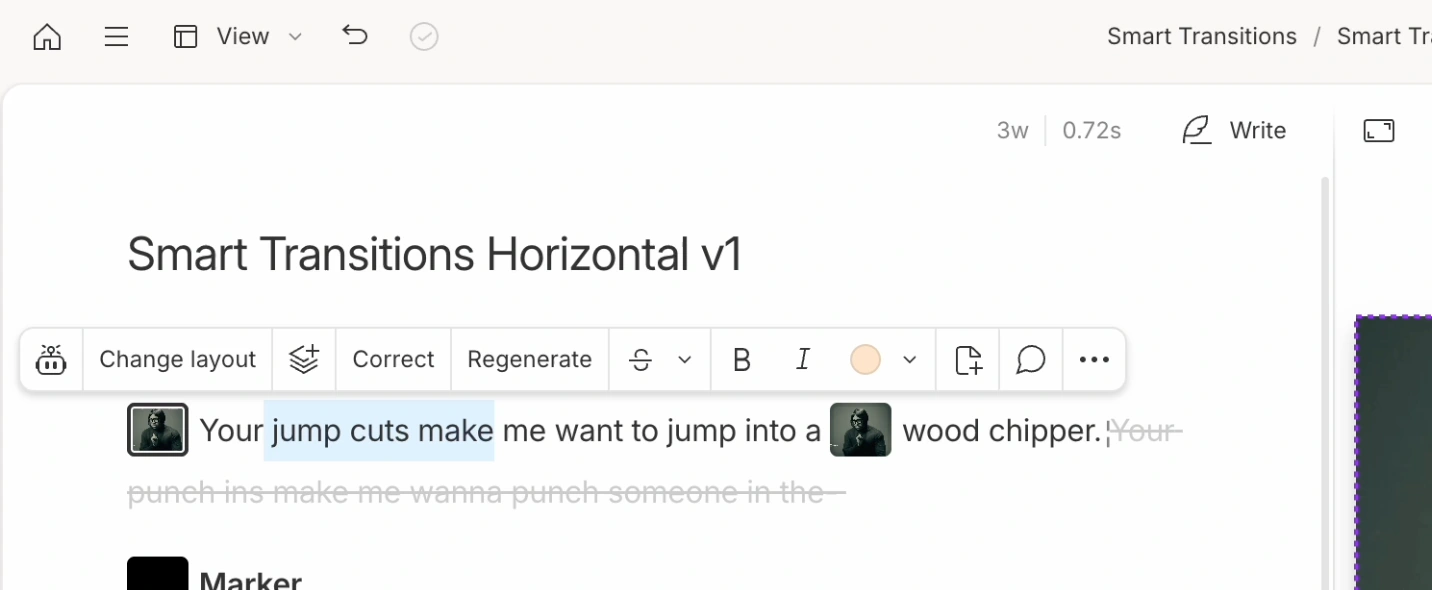
Correcting “Canon” when the transcript says “cannon” changes the displayed text, not the spoken recording. If you actually said the wrong product name, correcting the transcript alone will not fix what viewers hear.
Check names, measurements, prices, and technical terms especially carefully. A readable transcript makes the next editing pass much easier to judge.
3. Delete Repeated Takes and Move Complete Thoughts
Select the unwanted sentence in the script and press Delete or Backspace. In normal editing mode, Descript removes that passage from both the transcript and the linked media.
To move a passage, select it, cut it with Command+X or Ctrl+X, click the destination, and paste with Command+V or Ctrl+V. Move a complete thought so the result still makes sense.
Try removing the first of two repeated explanations, then replay the join. Keep the version with the clearest delivery, not automatically the shortest wording.
Listen for changes in meaning: removing “not,” a condition, or an exception can reverse the point. Check that pronouns such as “this” still refer to something the viewer has seen.
4. Review Filler Words Before Removing Them
Open AI Tools in the right sidebar and choose Remove filler words. Descript identifies candidates such as “um” and “uh” in English transcripts and lets you preview each occurrence.
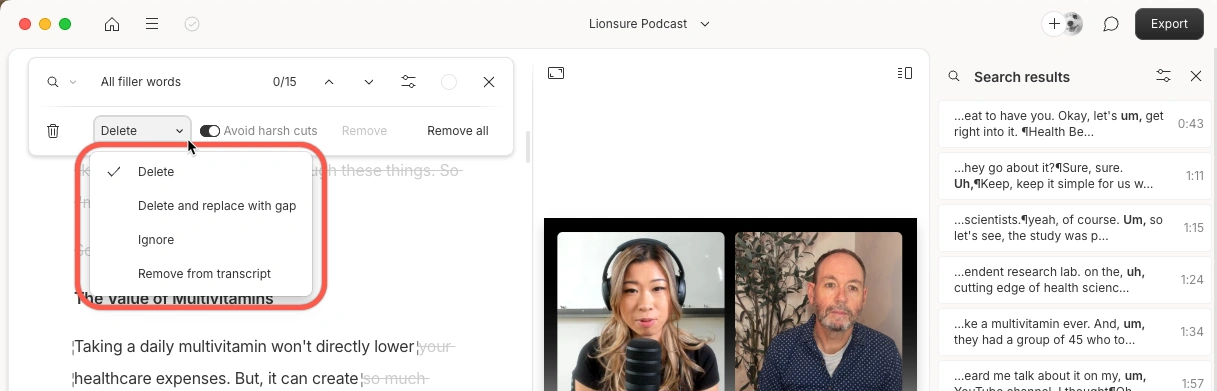
Choose the action that matches your intention:
- Delete removes the filler and its media.
- Delete and replace with gap preserves space at that point.
- Ignore keeps struck-through text visible while removing its audio.
- Remove from transcript hides the text but leaves the audio unchanged.
That last option is easy to confuse with a video cut. Preview a few changes before using the bulk action, and keep a filler if removing it makes the surrounding phrase sound clipped.
Filler-word removal uses AI credits on current plans. Check your available allowance before applying cleanup across a large recording library.
5. Shorten Long Pauses Without Flattening the Delivery
Choose Shorten word gaps from AI Tools. Set the duration that qualifies as a gap, then choose how much space to leave after shortening it.
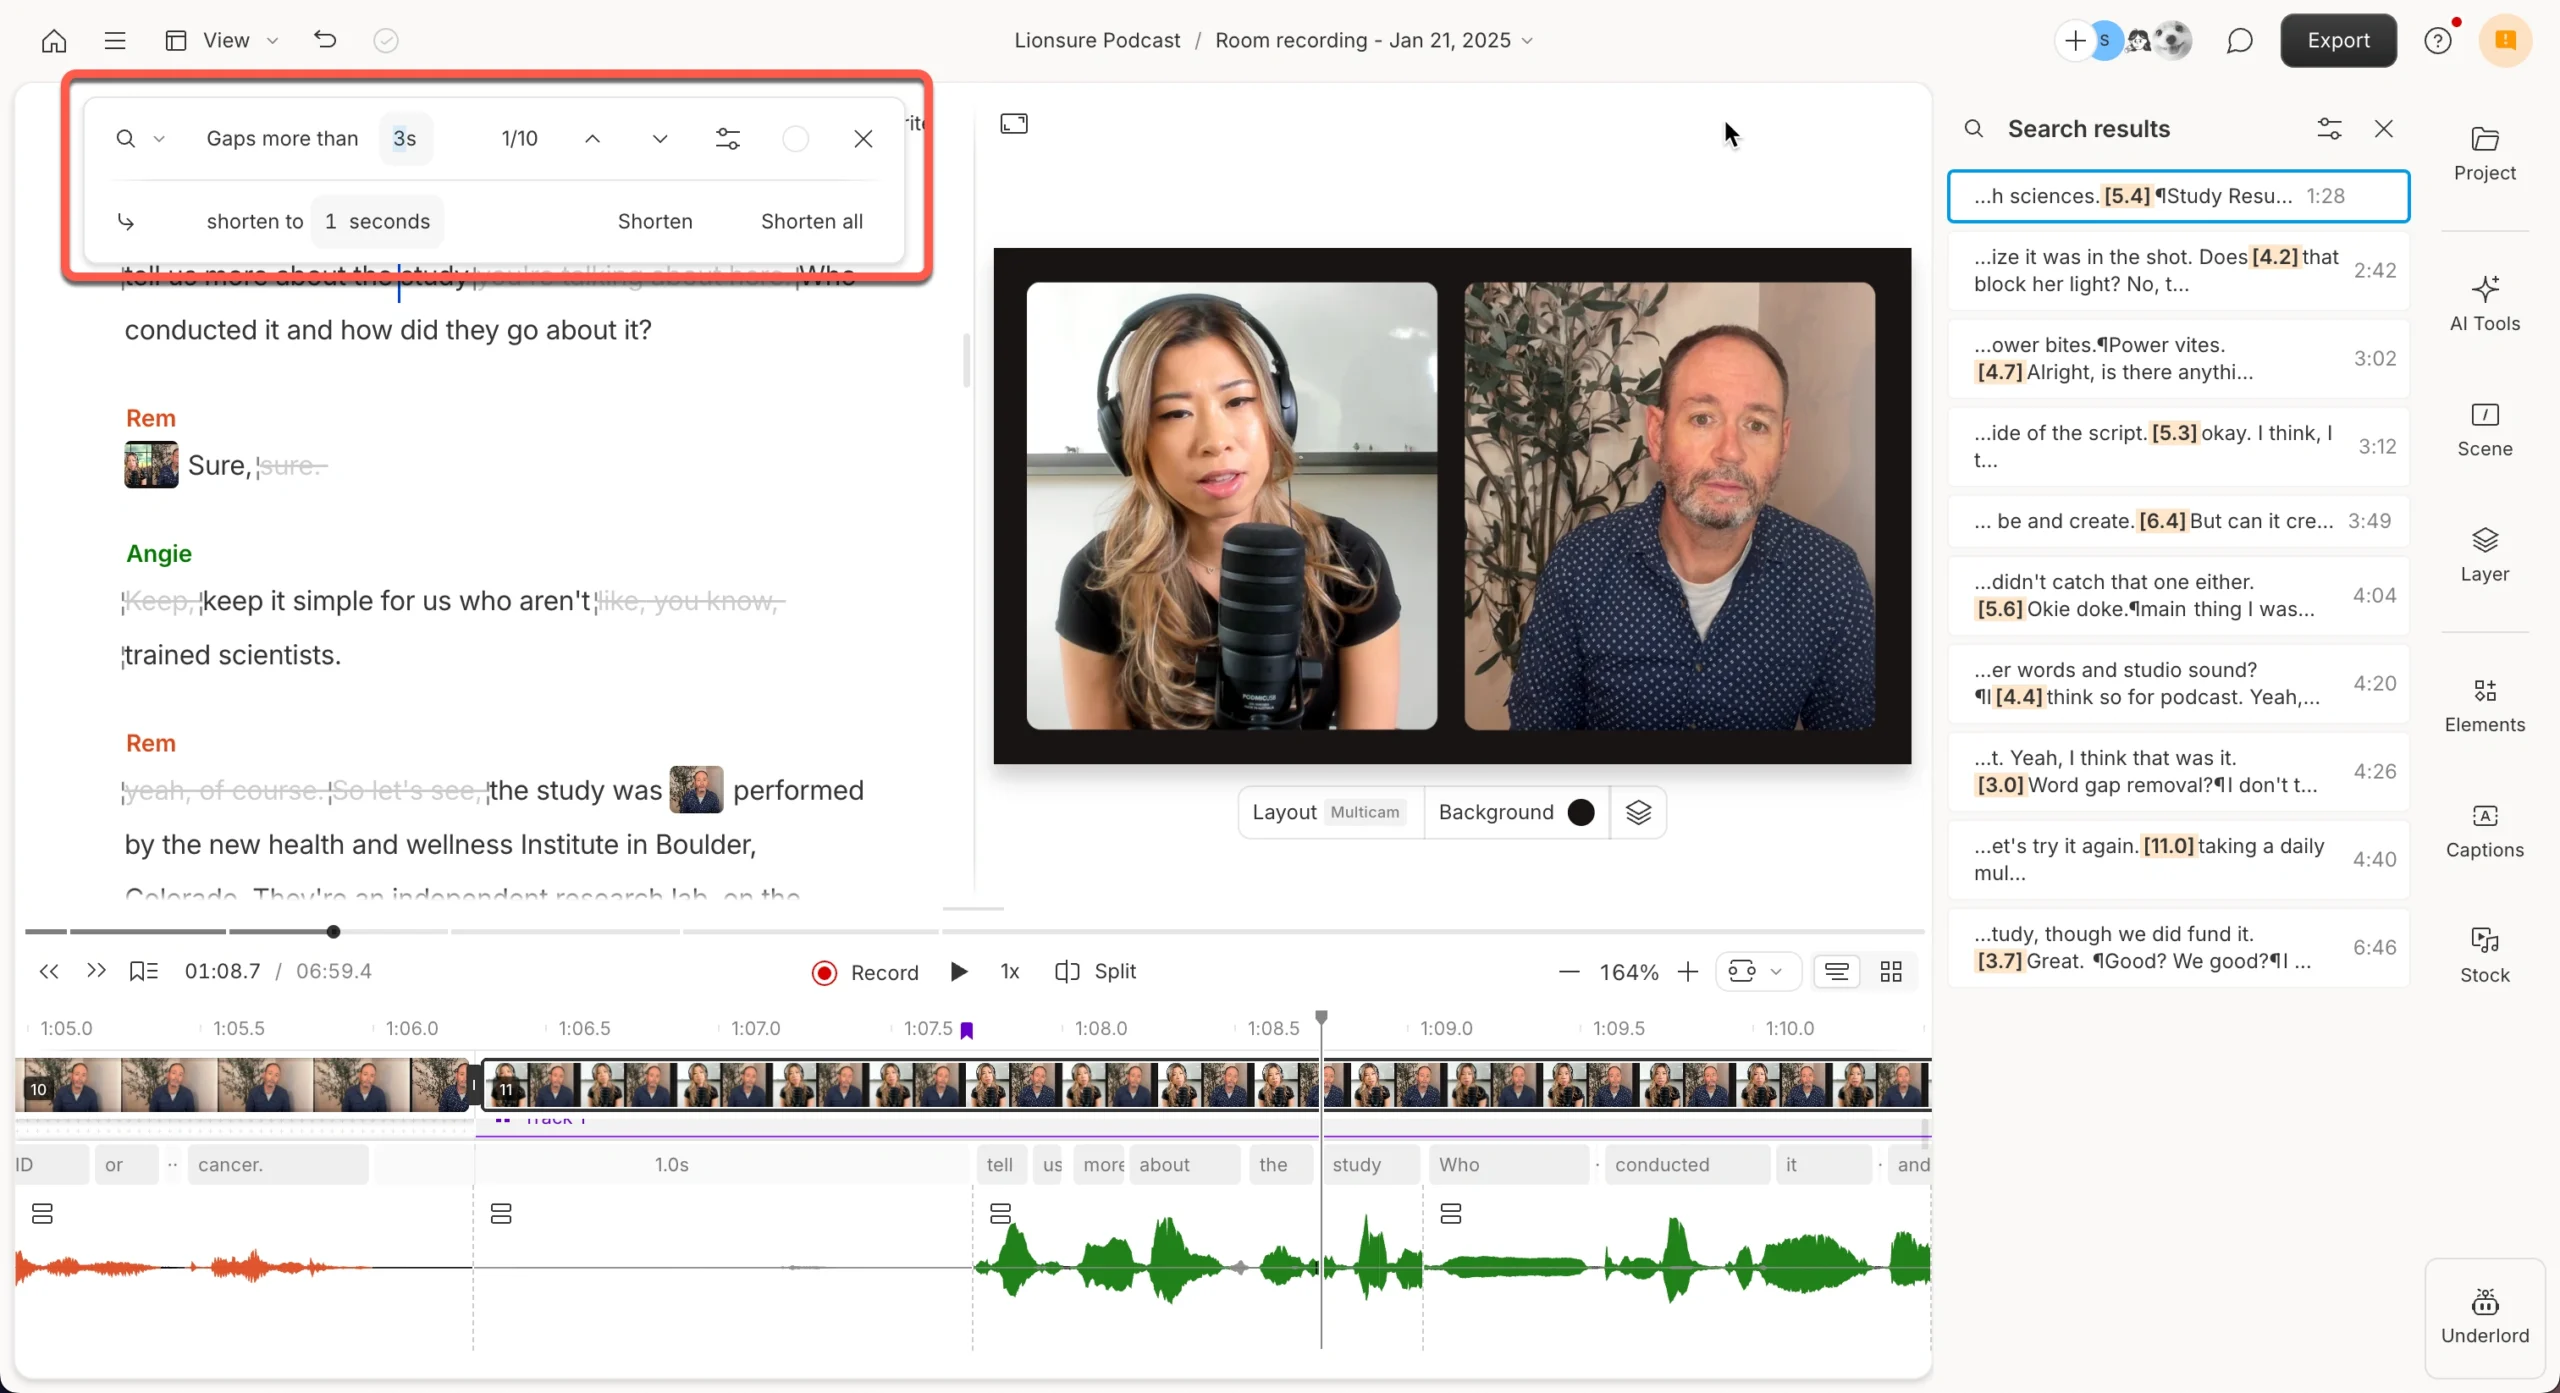
The official example shows gaps longer than three seconds being shortened to one second. Treat those values as an example, not a universal setting; a tutorial may need room for the viewer to inspect the screen.
Navigate through the results and use Shorten for individual gaps before considering Shorten all. Pause shortening also uses AI credits on current plans.
Leave breathing room around a new topic, an important warning, or a visual demonstration. Faster speech is not necessarily easier to understand.
6. Check Jump Cuts and Add Helpful Visuals
Watch the rough cut without reading along. If your head position suddenly changes between sentences, decide whether the cut is acceptable or needs a supporting visual.
Select the relevant script passage and use Add layer to insert a screenshot or video clip. Show the object, setting, or process being discussed, then review when that visual begins and ends.
Use the timeline for close timing adjustments that the words alone cannot show. A mouse click, hand movement, or slide change may need more footage than the spoken phrase suggests.
For a software tutorial, a real screen recording is usually more useful than a decorative AI illustration. Keep the important controls large enough to read, particularly if you later make a vertical version.
7. Check Captions and Export an MP4
Review the final wording before creating your caption deliverables. You can export an SRT or VTT subtitle file; that is different from adding visible caption graphics that remain on screen.
For the video, click Export in the upper-right corner, select Video, and choose Local export. Choose MP4, check that the export covers your current composition rather than an accidental selection, and select an available resolution.
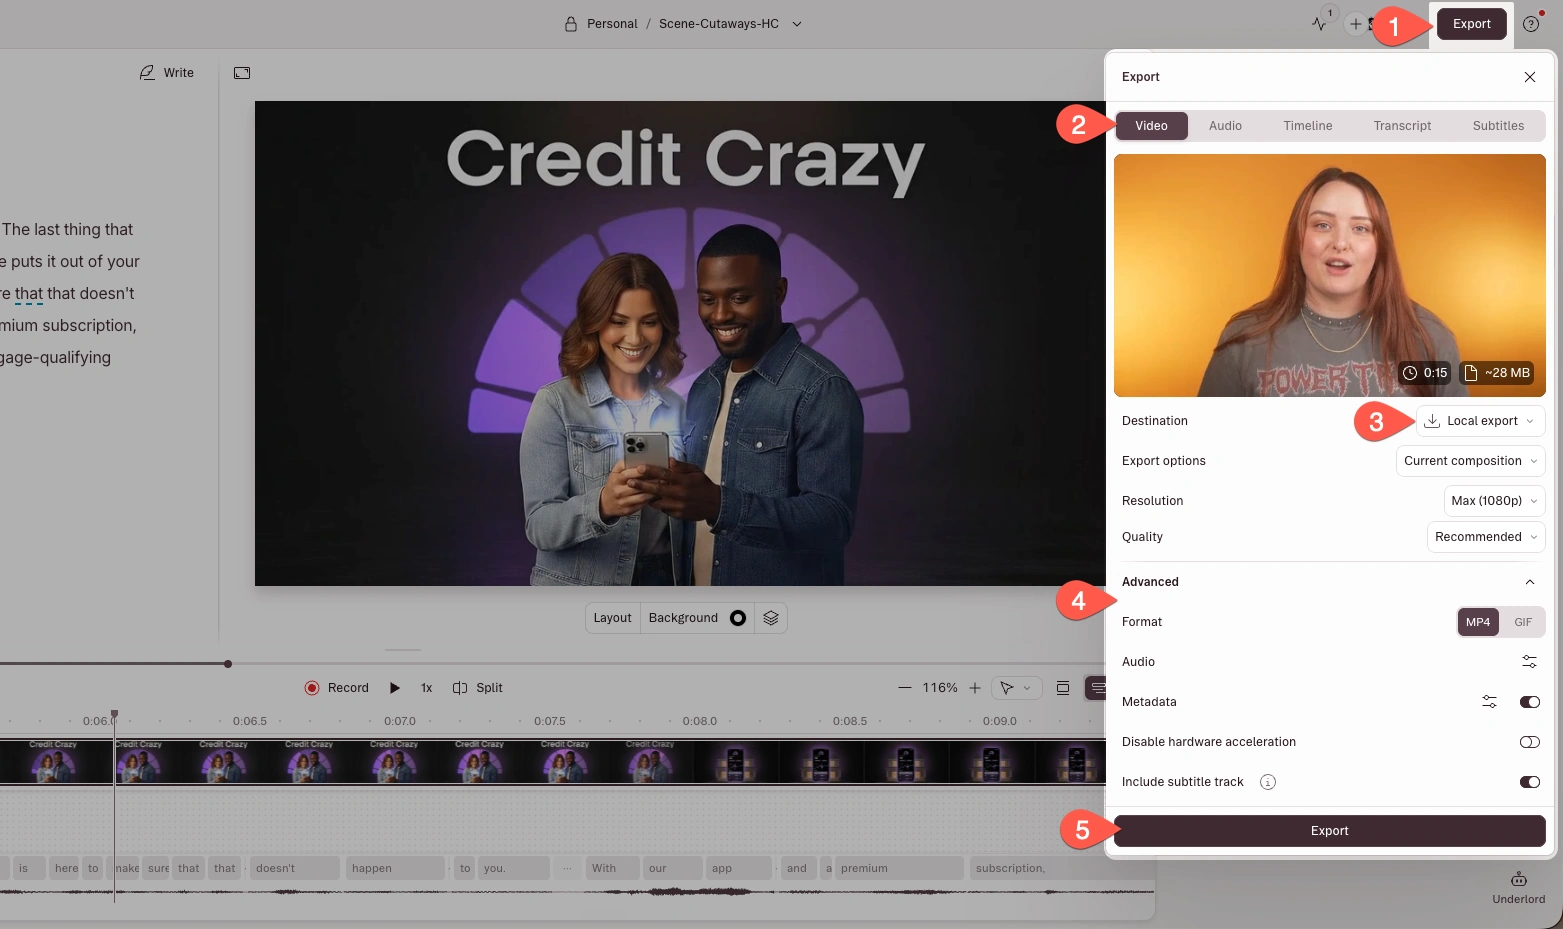
Check your plan’s resolution and watermark limits before a deadline. A higher export setting cannot restore detail that was missing from the original footage.
Open the exported file in a separate player and review the beginning, several edit points, and the ending. Confirm that your audio, visuals, and captions behave as expected before uploading it anywhere.
How the Workflow Differs in Adobe Premiere
If you already work in Premiere, Adobe’s Text-Based Editing connects transcript changes with timeline edits. You can assemble a rough sequence through dialogue and then refine its timing with your normal editing tools.
Keep the source transcript and the sequence transcript distinct: selecting material from a source and changing an assembled sequence are different operations. Use the sequence transcript when your goal is to change that sequence.
Premiere also provides transcript filters for pauses and filler words. Generate captions from your final edited sequence after the dialogue cut is settled.
Fix These Common Text-Based Editing Problems
| Problem | What to check |
|---|---|
| The transcript changed, but the speech did not | You may have used Correct or Remove from transcript instead of a media-editing action. |
| A cut swallows the start of a word | Undo the cut, listen around the boundary, and adjust timing on the timeline. |
| The video feels rushed | Restore selected pauses and use less aggressive gap shortening. |
| A demonstration disappears during silence | Keep pauses that contain useful visual action, even when nobody speaks. |
| Only audio export options appear | Check whether you are working in an audio-only composition. |
When exploring video trimming tools, judge the finished result rather than the number of automatic cuts. For broader video marketing, a complete explanation and clear next step matter more than shaving off another few seconds.
Conclusion
AI text-based video editing gives you a practical way to shape spoken footage through its transcript. Start with accurate text, remove redundant passages, review fillers and pauses, then finish the visuals and export. Your most useful check is still watching and listening to the final video: the edit should preserve the meaning and make the explanation easier to follow.